
Complete Webflow Migration Checklist for 2026

I've managed over 50 Webflow migrations, and the pattern is always the same: teams underestimate the SEO complexity until traffic drops 30% post-launch. In severe cases, traffic losses can reach 44%, roughly 500,000 users for one documented migration. The difference between a smooth migration and a six-month recovery project comes down to one thing: a detailed checklist that accounts for every redirect, metadata transfer, and technical configuration.
This guide covers the complete website migration process I've refined through years of client work, from pre-migration audits and baseline benchmarking through DNS cutover and post-launch monitoring.
The 4 Phases of a Successful Webflow Migration Process
Google's site migration guidance recommends a phased approach. I've refined this into four distinct stages based on what actually works.
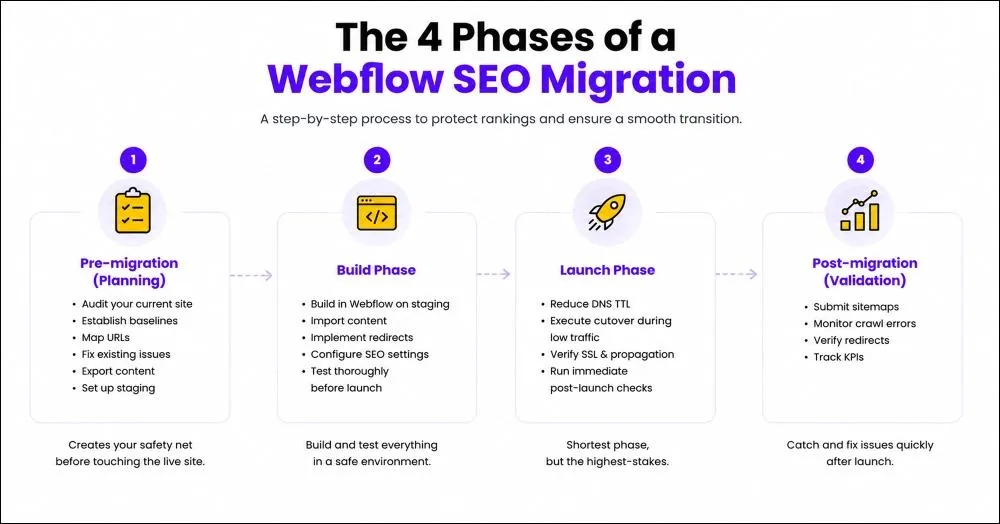
Pre-migration (planning): Audit your current site, establish baselines, map URLs, fix existing issues, export content, and set up staging. This creates your safety net before touching the live site.
Build phase: Build in Webflow on staging, import content, implement redirects, configure SEO settings, and test thoroughly before launch.
Launch phase: Reduce DNS TTL, execute the cutover during low traffic, verify SSL and propagation, then run immediate post-launch checks. This is the shortest phase, but the highest-stakes.
Post-migration (validation): Submit sitemaps, monitor crawl errors, verify redirects, and track KPIs. This catches and fixes issues quickly after launch.
Each stage has specific checkpoints. Skip one, and you're gambling with your organic traffic.
Pre-Migration Checklist
Before you touch anything, you need a complete picture of what you're working with. This phase is about documentation, baseline metrics, and fixing problems before they follow you to the new platform.
Conduct a Comprehensive Website Audit to Define Migration Scope
Start by crawling your entire site. I use Screaming Frog's migration methodology for this. You're mapping all indexable URLs, internal linking patterns, navigation hierarchy, and site depth.
Create a content inventory. Catalog every page, post, media file, and downloadable asset. This becomes your migration checklist.
Identify existing technical issues: broken links, duplicate content, missing metadata, and slow pages. Fix these BEFORE migration. Don't carry problems to your new platform.
Audit Forms, Integrations, and Custom Code
Before you build anything in Webflow, document everything your current site does. This is the step teams skip most often, and it is why forms stop working and lead data disappears after launch.
- List every form on the site: its fields, required validations, and where submissions go. Common destinations include email, HubSpot, Salesforce, Mailchimp, Google Sheets, or custom webhooks via Zapier. If you do not know where a form submits, test it before migration.
- Check your project-level custom code in Site Settings. This is where analytics snippets, tag managers, chat widgets, and marketing pixels live. Then check every individual page's settings panel for page-level scripts. Page-level custom code is the most commonly missed item in migrations because most people only look at the project level.
- Document every third-party integration: Google Analytics, Meta Pixel, LinkedIn Insight Tag, Hotjar, Intercom, Calendly. Each one needs to be reinstalled on the new Webflow site. This inventory becomes your integration checklist for the build phase. Every item on it needs to be verified as working before DNS cutover.
Benchmark Current Rankings and Traffic with SEO Baseline Metrics
You can't measure migration success without knowing where you started. Export 3-6 months of Google Analytics data: sessions, users, landing pages, conversion rates.
Document current positions for your top 50-100 target keywords using Ahrefs, SEMrush, or Google Search Console. Export your complete backlink profile. Record current Core Web Vitals scores from Chrome UX Report.
| Metric | Tool | What to Record | Acceptable Post-Migration Range |
|---|---|---|---|
| Organic traffic | Google Analytics | Monthly sessions, users | Within 15% of baseline after 4 weeks |
| Keyword rankings | Ahrefs/SEMrush/GSC | Top 50–100 keyword positions | Return to baseline within 6 weeks |
| Backlink profile | Ahrefs/SEMrush | Linking domains, anchor text | No significant loss |
| Core Web Vitals | GSC/CrUX | LCP, CLS, INP scores | Improvement expected |
Audit URLs, Metadata, and Site Structure
Export all URLs with status codes, canonicals, and indexation status. Identify which URLs to preserve, redirect, or remove.
Audit title tags, meta descriptions, H1 tags, and image alt text. Flag missing or duplicate metadata for fixing before migration. Establish URL policy decisions now: trailing slash rules, lowercase conventions, parameter handling.
Build Your Redirect Map with Detailed URL Mapping
Create a spreadsheet with columns: Old URL, New URL, Redirect Type (301), and Notes. This becomes your redirect implementation source of truth.
Avoid many-to-one redirects. Studies indicate that 301 redirects transfer 90-99% of link equity when properly implemented. Google may treat mass redirects to irrelevant destinations (like your homepage) as soft 404s. Each redirect points to genuinely equivalent content. Prioritize by link equity: URLs with the most referring domains get implemented and tested first.
Fix SEO Issues Before You Migrate
Resolve existing broken internal links and 404 errors on the old site. Don't migrate problems.
Consolidate or canonicalize duplicate pages before migration. Complete missing title tags, meta descriptions, and alt text. It's easier to fix once than recreate it in Webflow.
Export All Content and Data
Assess each piece of content before exporting. For every page and post, check traffic, backlinks, conversion value, and relevance. Decide whether to migrate, archive, consolidate, or delete. Migration is an opportunity to clean up. Do not carry dead weight to the new platform.
Export your CMS content to CSV. Every collection needs its own export. Check that long rich text fields have not been truncated, as this happens with some export methods. Verify field completeness before moving on.
Download all media files: images, videos, PDFs, and downloadable documents. Webflow serves media from its own CDN, so every file needs to be hosted on the new platform. Catalog each file with its current URL. You will need this for redirect mapping and to verify nothing gets missed during import.
Create Complete Backups
Export your full database, media library, theme files, and plugin configurations from your current platform. Store copies in at least two places: local storage and cloud. I keep backups accessible for at least 90 days post-migration.
This is your rollback safety net, not your staging environment. If something goes critically wrong after launch and cannot be fixed quickly in Webflow, you need to revert DNS and bring the old site back online within minutes. That is only possible if backups are intact, accessible, and verified before you touch anything.
Test your backup before moving on. A backup you have never tested is not a backup.
Set Up a Staging Environment
Webflow's staging domain gives you a private environment to build, test, and validate the entire migration before it touches your live site. Your staging domain sits at yoursite.webflow.io and is separate from your custom domain.
Before you start building, add a noindex tag to your staging site in Webflow's SEO settings. This prevents Google from crawling and indexing your work in progress. One of the most damaging post-launch mistakes is forgetting to remove noindex from the live site, so establishing that habit of intentional noindex management starts here.
Treat staging as your source of truth throughout the Build phase. Every step happens on staging first. Nothing goes live until staging has been fully tested and signed off.
Build Checklist
Everything in the build phase happens on your Webflow staging domain. You are building, testing, and validating before anything touches the live site. Work through these steps in order. Do not move to the launch phase until every item is checked off.
Import and Format Content
Webflow CMS imports require CSV format. Each collection needs its own file with these columns: Name, Slug, Post Body, Meta Description, Featured Image URL, and any custom fields.
After importing, review every collection for:
- Formatting issues from Gutenberg blocks or page builder markup
- Broken internal links
- Missing images
- Truncated rich text fields
Migrate and Optimize Media Assets
Upload images directly to Webflow's asset manager, or reference external URLs in CSV imports, and Webflow will fetch and host them.
Image guidelines:
- Compress before upload, target under 200KB for most images
- Use WebP format where possible
- Transfer alt text to Webflow's image settings for every image
Alt text requires particular attention. According to the WebAIM Million 2026 report, 16.2% of all home page images are missing alternative text, and missing alt text remains one of the top six accessibility failures on the web. It is one of the most common migration failure points because automated imports frequently drop it.
Configure Webflow CMS Collections
Create CMS Collections for every dynamic content type: blog posts, case studies, team members, and testimonials. Define fields that match your existing content model exactly.
Pay particular attention to reference fields. If your blog posts reference an author collection, those relationships need explicit mapping before importing dependent collections. Connect Collection templates to your design and verify that every item generates a correctly formatted page before moving on.
Transfer Critical SEO Elements
For every page, transfer and verify:
- Title tags and meta descriptions in Webflow's SEO settings
- H1 to H6 heading structure in the rich text editor
- Canonical tags pointing to the correct final URLs
- Structured data recreated via custom code embeds or Collection field bindings
- Open Graph tags for social sharing
Webflow auto-generates a sitemap and self-referencing canonicals by default. Verify that all important pages are included in the sitemap and that noindex pages are correctly excluded. Use Google's Rich Results Test to validate structured data after implementation.
Update All Internal Links
Every internal link on the new site needs to point directly to its correct Webflow URL. Do not rely on redirects to catch links pointing to old URLs: they add latency and waste crawl budget.
Check the navigation menus and footer links, in-body content links and CTA buttons, breadcrumbs and pagination links, and CMS Collection templates.
Run a crawl of your staging site with Screaming Frog after updating. Any link returning a redirect status on staging is still pointing to an old URL. Fix it at the source.
Implement All 301 Redirects in Webflow
Set up 301 redirects in Project Settings > Hosting > 301 Redirects. Webflow supports manual entry, CSV bulk import, or API management (Enterprise only).
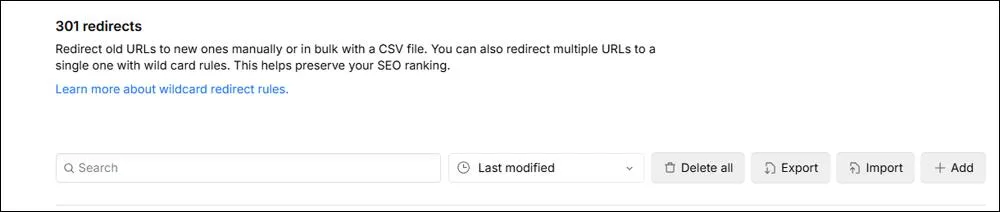
For large migrations (100+ redirects), use CSV import to reduce manual entry errors. Format: Old Path | New Path. After implementation, use Screaming Frog to test all redirects. Verify 301 status codes, correct destinations, and no redirect chains. Keep chains to 3 hops or fewer per Google's guidance.
Configure Technical SEO Settings
Before moving on, verify:
- robots.txt is not blocking any pages intended for indexing
- Staging noindex tag is in place and noted for removal at launch
- Canonical tags are correct across all page types
- Open Graph tags are set for every page type
Install Analytics and Tracking
Add your Google Analytics 4 data stream and Google Tag Manager container in Webflow's Site Settings under Custom Code. Place the GTM head snippet in the head section and the body snippet at the start of the body section.
Reinstall every tracking pixel and script from your integrations audit in Phase 1. Meta Pixel, LinkedIn Insight Tag, Hotjar, Intercom, and any other tools. Do not rely on memory. Work through your integrations checklist item by item.
Verify GA4 is receiving hits before proceeding. Use GA4's Realtime report to confirm page views are being recorded on staging. Verify that conversion events fire correctly on form submissions. If tracking is not confirmed working on staging, it will not work on launch day.
Test Forms and Interactive Elements
Recreate simple forms using Webflow's built-in form builder. Configure email notifications and success states.
For complex forms (multi-step, conditional logic, CRM integration), use tools like Formstack, Typeform, or Webflow's native Zapier integration. Reconnect integrations (HubSpot, Mailchimp, Salesforce) using Webflow's form webhooks or Zapier. Test data flow end-to-end before launch.
Verify Responsive Design and Cross-browser Compatibility
Test every page on Chrome, Safari, Firefox, and Edge on desktop. Webflow's generated CSS sometimes relies on properties that behave differently across browsers. Issues found here are far easier to fix before launch than after.
Test on real iOS and Android devices, not just browser DevTools. DevTools approximates mobile behavior but does not replicate real touch events, scroll behavior, or viewport-specific rendering accurately enough to substitute for device testing.
Check every breakpoint in Webflow Designer's responsive preview: desktop, tablet, mobile landscape, and mobile portrait. Verify touch targets are large enough, navigation works on small screens, and forms are usable on mobile.
According to HTTP Archive Web Almanac data, mobile Core Web Vitals pass rates at 43% are lower than desktop at 54%. Run Lighthouse on your top ten pages on mobile specifically. Performance issues found now are straightforward to fix. The same issues found post-launch require emergency patches under pressure.
Final Staging QA
Run Screaming Frog on the staging domain one final time. Zero broken links, zero missing metadata, zero redirect chains.
Build phase sign-off: Before scheduling DNS cutover, get explicit sign-off from stakeholders on the staging site. Walk them through it page by page if needed. Once you launch, fixing missed items happens under time pressure with real traffic affected, catching issues now costs an afternoon, catching them post-launch costs rankings.
Launch Checklist
The launch phase is a precise sequence of steps executed in a short window. If the build phase has been done correctly, this should be straightforward. Schedule your cutover during your lowest-traffic period, typically late night or early morning in your primary audience's timezone.
Reduce DNS TTL 24–48 hours before cutover
Log in to your domain registrar and reduce the TTL on your DNS records to 300 seconds, which is 5 minutes. Do this 48 hours before your planned cutover time.
TTL controls how long DNS resolvers cache your records. Reducing it before migration means that when you update your records, the change propagates globally in minutes rather than hours. If something goes wrong at launch, you can revert and have most users back on the old site within minutes.
Execute DNS Cutover
Point your domain's A records to Webflow's IP addresses, provided in your Webflow project under Site Settings > Publishing > Custom Domains. Update both the root domain and the www subdomain.
If your domain is registered through Cloudflare, propagation happens almost instantly. Other registrars typically take between 5 and 30 minutes.
Monitor DNS propagation
Use a DNS checker tool to verify your domain is resolving to Webflow's servers globally. Do not assume propagation is complete because it is working on your local machine. Expect 5 to 60 minutes for most users.
Verify the SSL certificate
Once DNS has propagated, confirm HTTPS is working on your domain. Webflow provisions SSL certificates automatically through its Cloudflare infrastructure, but verify that the certificate is active.
Then check for mixed content warnings, which occur when an HTTPS page loads resources such as images or scripts over HTTP. Check your browser console on key pages and resolve any warnings before directing traffic to the new site.
Immediate Post-Launch Checks
Within the first 30 minutes, run through this sequence:
- Submit a test form from a real device and verify that the submission arrives
- Confirm GA4 is receiving hits on the live domain via the Realtime report
- Test your top five redirects manually by visiting old URLs
- Check error logs for any 404s or 500s appearing in real time
Keep the Old Site Accessible for 30 days
Do not delete or downgrade your previous platform account for at least 30 days. Keep it as a read-only reference and rollback option. After 30 days of stable performance, you can safely decommission it.
Post-Migration Checklist
The work doesn't stop at launch. The first few weeks after migration determine whether you preserve your rankings or watch them slip away.
1. Submit Your XML Sitemap to Google Search Console
Submitting your Webflow-generated sitemap signals the migration and helps Google discover the new URL structure faster.
In Google Search Console, navigate to Sitemaps, enter your sitemap URL (typically yourdomain.com/sitemap.xml), and click Submit. Sitemap submission can reduce the discovery lag from weeks to days.
2. Monitor Crawl Errors and Validate Indexing Status
Use Google Search Console's "Pages" report to track indexed pages, crawl errors, and excluded pages. Focus on fixing "Error" status pages first (4xx, 5xx, redirect errors), then address "Excluded" pages that belong in the index.
Expect 1-4 weeks for Google to fully re-crawl and re-index your site. Monitor daily during this period.
3. Verify Redirects Are Resolving Correctly
Verify 301 status codes, correct destinations, and no chains.
Test redirects for your top 100 landing pages (by traffic) first. If you find redirect chains (A→B→C), update to direct redirects (A→C) to reduce latency and crawl budget waste.
4. Scan for Broken Links and Monitor 404 Errors
Run a full-site crawl with Screaming Frog or Sitebulb to identify broken internal links (404s) introduced during migration.
Check Google Search Console's "Not found" report daily for the first 2 weeks. For legitimate 404s (old URLs that belong in redirects), add the missing redirects immediately. For invalid URLs, investigate the source and fix the linking page.
5. Update External Backlinks to New URLs
Use Ahrefs or SEMrush to identify your top 50-100 backlinks (by domain authority and traffic).
Contact webmasters of high-value linking sites to request that they update links to point directly to new URLs. This eliminates redirect latency and preserves full link equity. Even with redirects in place, monitor that external links are resolving correctly.
6. Run a Complete Technical SEO Audit
Use Screaming Frog or Sitebulb to crawl the live Webflow site. Verify no broken links, missing metadata, or indexation issues.
Confirm all pages have unique title tags, meta descriptions, and H1 tags. Verify that canonical tags point to the correct URLs. Ensure robots.txt isn't blocking important pages and that staging/test pages have noindex tags.
7. Address Pagination, Faceted Navigation, and URL Parameters
For paginated content like blog archives and product listings, implement a Load More approach where possible to avoid pagination entirely. If pagination is unavoidable, use canonical tags pointing each paginated page to the main collection page.
For sites with filtering (e-commerce, directories), use canonical tags to consolidate filter variations. For sites with URL parameters, use canonical tags to point parameter variations to the clean URL and ensure robots.txt does not block parameter versions you want indexed.
8. Validate Multilingual Sites and Hreflang Annotations
Use Webflow's native Localization feature to create language/region variants. This auto-generates locale-specific URLs.
Webflow Localization auto-generates hreflang tags. Validate using Google Search Console's International Targeting report. According to Webflow's Localization documentation, locale routing uses 302 redirects. You'll need separate 301 redirect rules for each localized path if URLs change during migration.
Understanding the Types of Site Migration
Most Webflow migrations involve platform migration, often combined with site restructure. Understanding which type applies to your project shapes your redirect strategy and timeline.
Domain Migration
Domain changes happen during rebranding, consolidating multiple domains, or moving from a subdomain to the root domain. I've handled several of these, and they're genuinely complex.
You're managing platform redirects and domain-level redirects simultaneously. The validation workload doubles. Every URL requires testing on both the old domain and the new domain paths. In one case, we helped LeMieux transition to a new domain while maintaining their SEO equity. Their keyword rankings in the top 10 increased by 34% post-migration, proving that careful planning preserves and even enhances visibility.
Platform Migration
Platform migration is the core Webflow scenario: same domain, new CMS. You're transferring from WordPress, Squarespace, or Wix to Webflow while maintaining your existing domain and URL structure where possible. This is what most "Webflow migration checklists" address.
Server Migration
Unlike WordPress (where you choose a separate hosting provider), Webflow includes hosting. So "server migration" happens automatically as part of the platform switch. You still update DNS records to point your domain to Webflow's servers. That cutover moment is when your site goes live on the new platform.
Site Restructure Migration
Sometimes you're not just changing platforms. You're reorganizing everything. Flattening deep URL hierarchies, removing date-based blog URLs, consolidating duplicate content, and implementing new taxonomy.
Every URL change requires a 301 redirect. Restructures can create hundreds or thousands of redirect rules. I've built redirect maps with 2,000+ entries for large site restructures. For example, when we worked with a Latin American telecom company operating across 25 markets with multiple language variations, the entire URL structure changed. We manually reviewed and mapped every URL to ensure appropriate redirects, resulting in a 33% traffic increase and 64% more keywords in the top 10 positions.
Essential Tools and Technologies for Webflow Migration
The right tools make migration manageable. Here's what I use for every project.
Technical SEO Crawlers: Screaming Frog, Sitebulb, and DeepCrawl
Crawlers create a complete URL inventory, identify broken links, audit metadata, and map internal linking structure. Use them to test all 301 redirects at scale. Screaming Frog's migration tutorial covers the methodology in detail.
Analytics and Monitoring: Google Analytics and Google Search Console
Google Analytics tracks traffic trends, user behavior, and conversion rates before and after migration. Google Search Console monitors indexing status, crawl errors, search performance, and Core Web Vitals. Verify that GA4 and GSC tracking codes are correctly implemented on all Webflow pages.
SEO Research Platforms: Ahrefs and SEMrush
Identify high-value backlinks that belong in redirects or updated via outreach. Monitor ranking changes for target keywords before and after migration. Compare your post-migration performance against competitors.
Migration Automation: PowerImporter for Webflow
PowerImporter automates bulk content migration to Webflow CMS Collections, maintaining rich text formatting, internal links, and media embeds. It is primarily designed for WordPress migrations. For sites with 50+ pages migrating from WordPress, it reduces manual content migration time by 80-90%.
When to Migrate Your Website to Webflow
Timing matters more than most people realize. I've seen companies rush migrations and spend months recovering, while others wait for the right moment and come out stronger. Here's when the conditions are right.
During a Full Website Redesign
If you're already planning a redesign, that's your window. You're restructuring content, updating designs, and aligning stakeholders anyway. Adding a platform migration doesn't double the workload.
I've watched companies redesign on WordPress, then migrate to Webflow six months later. Two major projects instead of one. Two rounds of stakeholder approvals. Two content audits. Combining them saves time and headaches.
When You Outgrow Your Current Platform
You know the signs. Your WordPress site runs 25+ plugins, and every update breaks something. On HubSpot, you hit design ceilings that require developer workarounds for basic changes. On Squarespace, you've outgrown the template constraints and can't get the site to look or function the way your brand needs. Across all three, your marketing team is waiting days for changes that should take minutes.
When Organic Performance Has Plateaued
Technical debt accumulates quietly. Years of theme updates, plugin conflicts, and workarounds create code bloat. Google's crawlers slow down. Pages take longer to index.
Sites with poor Core Web Vitals face ranking challenges that content alone can't fix. Currently, only 44% of WordPress sites on mobile devices pass all three Core Web Vitals tests. According to web.dev's performance documentation, LCP above 4 seconds, CLS above 0.25, and INP above 500ms all signal problems. If you've hit a ceiling despite solid content work, the platform might be holding you back.
One thing to assess before committing: Webflow does not support PHP, Python, or other backend languages. Sites with custom server-side functionality, such as membership systems or complex user authentication, will need to rebuild these using JavaScript or third-party services like Memberstack. Factor this into your migration scope before you start.
Webflow Migration Cost Considerations
DIY migration costs: Webflow Site plan fees (Basic at $15/mo, CMS at $25/mo, all billed annually; Ecommerce plans run $29–$212/mo depending on tier) plus tool costs like Screaming Frog licenses and PowerImporter. Total $500–$2,000 for small sites.
Agency migration costs: Professional migrations run from $5,000 for small sites up to $50,000+ for large or complex builds. Site size, design complexity, custom functionality, content volume, and integration requirements all affect pricing.
For sites with significant organic traffic or revenue tied to search, agency pricing is often justified by the cost of not hiring one. A 30% traffic drop on a site doing 50,000 monthly organic visits can mean tens of thousands in lost revenue per month, far more than the migration itself.
When to Hire an SEO Expert for Your Migration
Sites with more than 10,000 monthly organic sessions, significant e-commerce revenue, or complex URL structures benefit from SEO expertise. The risk of traffic loss justifies the investment.
Sites with extensive custom functionality, large content databases, or complex integrations benefit from professional migration management. If your team lacks experience with technical SEO, redirect management, or Webflow development, professional help reduces risk.
Maria Harutyunyan is the Co-founder and Head of SEO at Loopex Digital, where she leads SEO strategy for SaaS, e-commerce, and B2B brands. With 10+ years in search, she specializes in link building and digital PR, earning editorial backlinks from MSN, Business Insider, Android Authority, and 30+ other major publications. She has been featured in Forbes, quoted as an SEO expert on Shopify, and writes for Convince & Convert, SE Ranking, and Mangools (KWFinder). She is also the founder of Armenia's first SEO Academy, having trained 500+ marketers.
Submit the form - Get Free Proposal
24 hours
Don’t forget to share this post!
Latest Articles


Submit the form - Get Free Proposal
24 hours

